3 different looks to decorate your Christmas table

This year’s festivities will necessarily be a small affair, but that’s no reason to give up on decorating your Christmas table.
Quite the contrary, in fact, we need to enjoy this festive atmosphere now more than ever. Sarah and Joana, from Mobitec’s new creative department, have concocted 3 inspirations to bring a touch of magic to your festive table!
To showcase our 3 creations, we opted for a Float T0601 multiplex table with “vintage oak” veneer, for a warm and festive look, and Rob C04 chairs, new for 2020, with a light-coloured covering.
The little extra: the table is equipped with an integrated extender, offering plenty of space to arrange your feast and your decorations!
A perfect combination that is sufficiently neutral to blend in with the 3 atmospheres that we want to create.
1. Golden touch
Sarah says:
“A radical change with this composition based on the colour white, complemented by touches of gold and natural objects and materials such as dried flowers, wood, linen, etc. The dried flowers are a surprising choice for Christmas, but they take on a festive allure when accented with touches of gold.
The DIY decorated bowl can replace place cards and make a fun souvenir for your guests!”
Materials: an unbleached linen table runner, linen napkins, a natural placemat, golden cutlery, crystal glasses, dried flowers (pampa, barley, etc.), wooden or white porcelain decorative objects, candleholders, a mix of materials such as cotton, jute, linen and wood.
Colours: white and ecru are the main colours of this atmosphere. Complement them with beige, brown and gold.
Do-It-Yourself:
Materials:
- Porcelain tableware (soup plate, bowl, cup, etc.)
- Permanent markers for porcelain (gold and black in our case)
- Pencil
- Cloth
- Water and dishwashing liquid
Instructions:
- Thoroughly clean the porcelain using the cloth to remove any remaining grease.
- Prepare your drawing using a pencil.
Tip: Place a thick book under your hand to keep it at the right height. - Trace over the lines with the marker.
If you are not happy with your drawing, you can erase it with the cloth or using solvent, and start over until you are happy with your drawing. - Leave to dry for 15 minutes and place your porcelain in the oven for 25 minutes at 160°C.
2. Magic Christmas
Joana says:
“For this composition, we are going back to the classics: traditional Christmas atmospheres are back in fashion. Just jazz them up with modern touches and elements to break up their old-fashioned side.
The final touch? Eucalyptus and olive branches and pomegranate seeds.”
Materials: a home-made table runner made of fir, eucalyptus and olive branches, pomegranates, holly branches, pine cones, white or classic tableware and glasses, small decorative wooden objects, kraft gift paper, jute, red and white string.
Colours: a mix of red, dark green, white and dark brown and optionally with touches of gold.
Do-It-Yourself:
Materials:
- Cooking chocolate
- Salt sticks or breadsticks
- Sugar pearls for decoration
- Hot plate
- Sauce pan and spoon
- Baking paper
Instructions:
- Melt the chocolate.
- Place a piece of baking paper on the table and place the breadsticks on top.
- Shape the Christmas trees using a spoon.
- Decorate the chocolate Christmas trees with decorative elements (before the chocolate hardens).
- Optional: personalise the Christmas trees with the names of your guests.
3. Dark elegance
Sarah says:
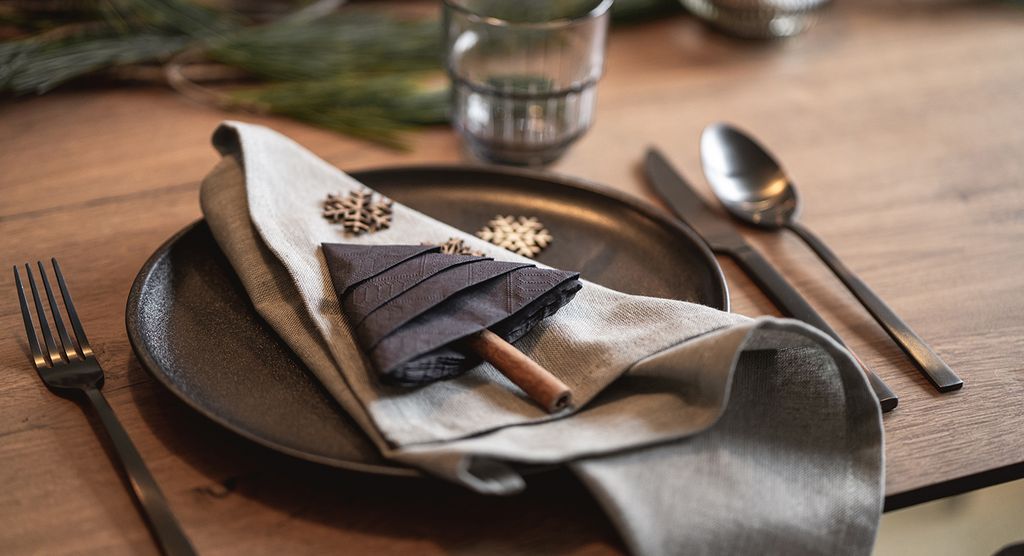
“The colour black is often associated with sadness. However, when used properly, it can create a warm, elegant and chic atmosphere! This can be achieved, in particular, by combining it with a very dark green, as can be seen in this example.”
Materials: black and white candles, pine branches, origami decorations, black decorative objects, black or dark green cotton napkins, black glasses for elegance, and, optionally, black cutlery for the final touch.
Colours: mainly black, complemented by touches of dark green, greige, dark brown and gold accents.
Do-It-Yourself:
Materials:
- Napkins (cloth or paper)
- Cinnamon sticks
Instructions:
- Simply follow the folding instructions in the video above!


